Mobile Gaming ‘Android’??

image

image

We have experienced the smartphones function to help us in our real life. The joy does not stop here yet. As I use Android phones about a year later, which was the glorious day of android 2.1 eclair version, there were some games to fulfill our needs. Some funny games that wasn’t exist in the era of windows mobile edition. Some use accelerometer in handling games and much more intuitive games are provided.

In recent years, android games has grown a massive improvement in graphic performance. They also require some memory to be downloaded as a game file for about more than 100mb more. Some games has an awesome graphic performance since the android phones nowadays have the ability to run this game. Their hardware are also growing and some known PC or console games has made some mobile gaming too.

image

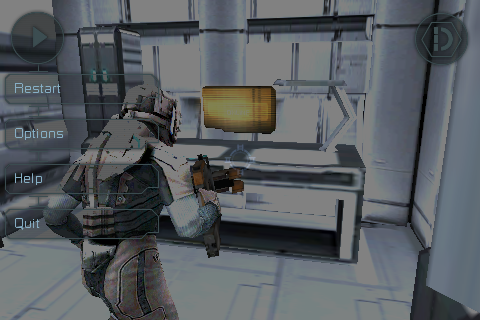
The above screenshot is a shadowgun which has a very nice graphic performace for mobile gaming. I really enjoy playing this games. You can refer to this link : https://market.android.com/details?id=com.madfingergames.shadowgun
image

image

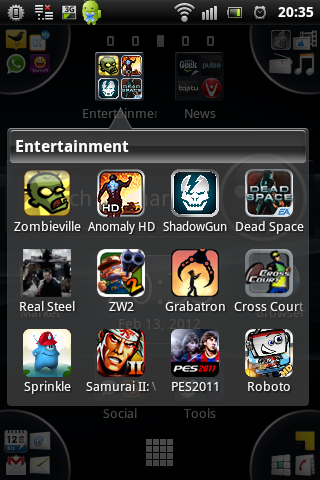
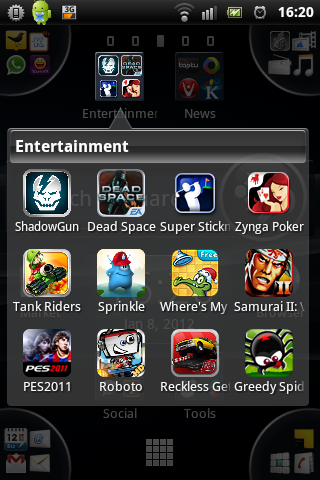
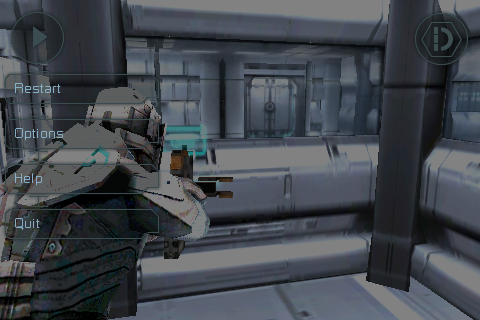
There are so many games out there with good graphic performance. You can try ‘Dead Space’, Sprinkle, PES 2012, Plants vs Zombie, Anomaly HD, Real Steel, etc. Maybe you can share some games for me to play too. Android rocks!!

Rooting your X10 Families Éclair

What is Rooting??

Rooting is a process that allows users of cellphones, and other devices, running the Android operating system to attain privileged control (known as "root access") within Android’s Linux subsystem, similar to jailbreaking on Apple devices running the iOS operating system, overcoming limitations that the carriers and manufacturers put on such phones. It also allows for newer versions of Android not supplied by the original device manufacturer. In contrast to iOS jailbreaking, rooting is not needed to run applications not distributed by the official Android Market with the exception of AT&T phones which are locked from installing third party applications[1]. It is needed however, when trying to access paid Android applications from countries which are not part of the paid applications market.[citation needed] Rooting is also necessary for certain applications and widgets that require additional system and hardware rights such as for rebooting the phone, certain backup utilities and hacks for hardware LEDs.

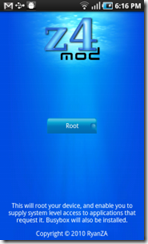
Rooting with Z4Root is as easy as one touch, you can root and unroot in an easier way. It is 100% safe – nothing on disk is changed besides the root binaries. If something goes wrong, simply rebooting the device should fix up any and all issues.

imageimage

Requirement :

1. Download the Z4Root v.1.2.0 from the market or the link I’ve provided.

2. Enable the USB Debugging, You can find it at Settings – Application – Development

3. After installing, run the Z4Root. It will install the latest SuperUser and compatible Busybox. If you wish to Unroot your phone, it will simply removes all it’s traces.

Your device now has been rooted, you can install some applications that need ‘root’ phone like TitaniumBackup, Clear cache, etc. Enjoy, CMIIW Open-mouthed smile

SE Xperia X10 Families support multitouch. Hope it will be released soon.

According to Sony Ericsson its crown jewel XPERIA X10 doesn’t sport the hardware needed for performing multi-touch gestures on the XPERIA X10. That’s why there’s no sign of pinch zooming in the Android 2.1 Eclair update despite that the smartphone has a nice capacitive screen.

main Turns out Sony Ericsson XPERIA X10 is capable of multi touch after all, I wonder why SE doesnt use it

Fortunately, some developers over at XDA didn’t buy that story and went on a quest for enabling multi-touch support on the Sony Ericsson flagship. And frankly, they’ve succeeded.

There is nothing more to say, just watch the demos.

I can’t imagine playing Angry Birds without the zoom-out pinch gesture.

The unofficial software fix is still in the works, but I hope it will be released as a user-friendly package soon enough.


References :

http://blog.gsmarena.com/turns-out-sony-ericsson-xperia-x10-is-capable-of-multi-touch-after-all-i-wonder-why-se-doesnt-use-it/

NDrive Installation on your Xperia X10 Mini Pro

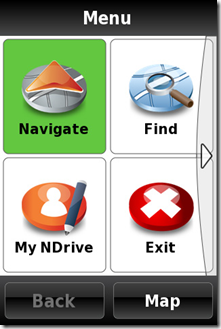
It takes time for me to find what best for my Xperia X10 Mini Pro to find the best offline GPS map. I lived in Indonesia, so before the upgrade of my X10 – used to be android donut version of 1.6 – I used the Sygic offline GPS map. After the latest upgrade – to Android éclair version of 2.1 – they erased all my program. From then on, I am eager to try the new one, NDrive. NDrive is a good application to be installed on your android. X10 Mini Pro has the limited screen, 2.55 inch, so I should carefully find a good program to be installed in. NDrive and Sygic fit best on this phone. I will show you how to install NDrive(Cracked with Indonesian maps) in this post.

image

Installation manual :

1. Install NDrive from your android market – about 3Mb of files

2. Download NDrive Indonesian Maps and place it on your SD Card ( SDCard – NDrive – Maps) : Indonesian Maps 2010

    • Unzip the files and move the unzipped files to your SD Card path : NDrive – Maps

3. Uninstall your NDrive

4. Install again NDrive from this link : NDrive 10

5. Download the Indonesian voice navigation : IndonesianVoice (Password : Guntur)

    • Unzip the files and move the unzipped files to your SD Card path : NDrive – Voice

When you finished installing with this instruction, you can open the NDrive application on your phone, and NDrive needs to download their application about 34Mb of files more. It’s okay to download, and after the download finished, you can enjoy your NDrive application. Make sure that when you open your Android Market, if there is an instruction to update your NDrive, DO NOT INSTALL / UPDATE. If you Update, your NDrive application will not be usable anymore.

ENJOY.

Upgrading X10 Families to Éclair.

I just upgraded my own X10 Mini Pro to Éclair version of 2.1. This is a huge upgrade since the X10 family has the limitation of Donut version of 1.6 for their handheld. Finally, The update comes to my country, Indonesia. It takes only half an hour to upgrade it myself. But, I believe it depends on your computer configuration and Internet connection. I will try to explain of what I am doing today step-by-step.

1. Start with this link, Follow and Download the files needed. The files about 35.3 Mb named Update Service.

2. Install the downloaded files to your computer.

3. After the installation complete, then run the files. Make sure you have your computer connected to Internet.

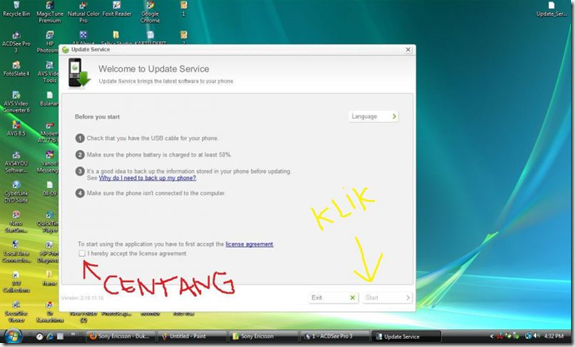
    • Welcome to The Update Service. Steps to be used in this configuration :
      • Prepare the X10 original USB cables
      • The battery of your X10 should be more than 50%.
      • Back Up your files –> VERY IMPORTANT. The upgrade will erase all your data stored in internal memory. (external memory will not be wiped)
      • Don’t connect your phone in this steps.
      • Check the “I hereby…..”
      • then Click START button

image

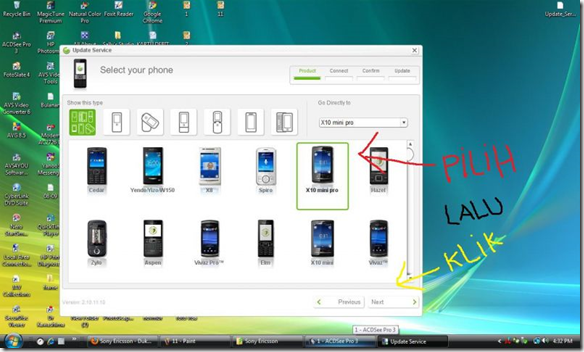
    • Choose your Phone, in my case I will choose X10 Mini Pro

image

    • Then This is the hardest Part. Please follow the steps carefully :
      • Turn Off your X10 device for a minimum 15 seconds
      • Connect your USB Cables to your PC
      • While connecting the USB Cables to your handheld, Press BACK button at your X10 device. Keep pressing the BACK button although the cable has been connected. You will see a blue LED in your X10.
      • Your PC will find a new hardware, Usually your PC will need a restart
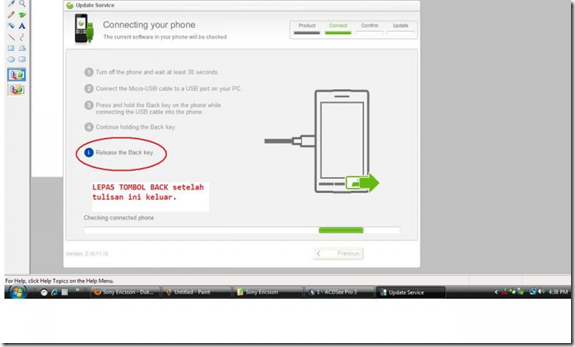
      • After restarting, follow the step from the beginning until you find the Press BACK button step, You should not release the button until you find “RELEASE THE BACK KEY” in your computer. After the button released then the installation process will then start.

image

    • The last step of the installation is downloading the files needed. It’s about 126MB of files and make sure you have a good internet connection here. Leave your X10 device connected to the computer as the download begin. After the download step has finished, then the installation process will be started. It takes about 5-10 minutes of installation.
    • After Installation, you can remove your X10 from Computer. Just Turn it on, then Enjoy your Éclair.